Frankie Beans Goes Bananas

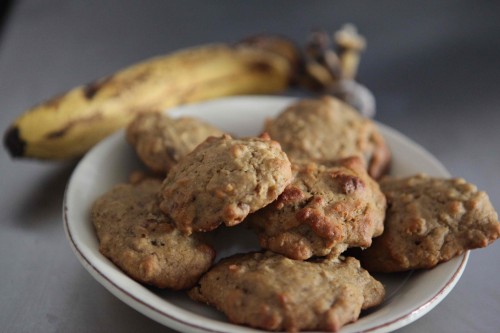
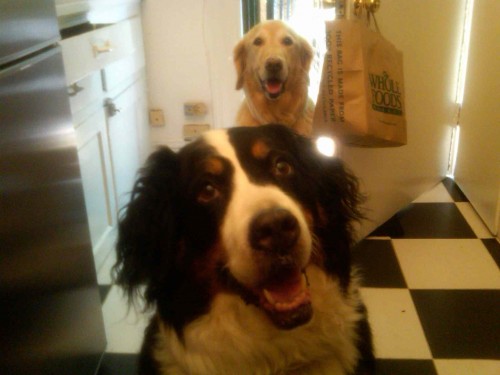
Frankie Beans always seems to have bananas on his brain! Every time I go in to the kitchen or even close to the kitchen where the bananas are he stares at me with a look that says “give me that banana!” This boy has loved bananas ever since he was a pup. Bananas and apples and carrots – the BEST treats for your doggies! They’re good for us to eat and just as good for them. As I’m standing there looking at these two very ripe bananas and one funny pup, I think banana cookies! Frankie happily agreed.

On another note, which leads to why I chose these specific ingredients, I have been feeling not my best and most recently been dealing with my eye lashes falling out. Which is always wonderful… I went to a few doctors and dermatologists and as usual got no specific answer which is the usual answer at this point. So I started my own investigation and will follow up in another post with what I found in detail. But the reason for these banana cookies is because I wanted to try to bake a treat taking out as many allergens as I can, even eggs. Maybe there was something else that I was allergic to?!? I knew it wasn’t nuts so I kept the almond flour and everything else was going to be as pure as possible.  Me and My Troop went in that kitchen and started working.

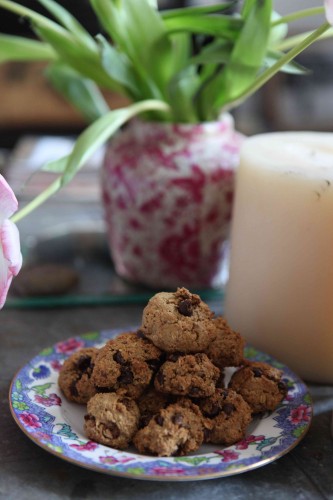
With Frankie steady by my side, I set off for a cookie that was gluten free, dairy free, soy free, xanthan gum free, corn free, egg free, refined sugar free, and low in sugar as well. Pure manic how these cookies didn’t come out taste free! Because these cookies came out so good!!! After a few attempts with the batter I got a moist savory cookie that kept fresh in my cookie jar for 6 days and would have kept longer but they were gone! And they would keep even longer if you kept them refrigerated. These delicious cookies are good for you and anyone you love, even a bite for your furry friend. :)

Banana Cookies

preheat oven 400*

1 cup almond flour

1 cup quinoa flour

1/4 cup arrowroot flour

3/4 cup certified gluten free oatmeal

1 tsp salt

1/2 cup maple sugar

1/2 tsp baking powder

3/4 tsp baking soda

1/2 tsp cinnamon

1/4 cup grape seed oil or canola oil

1/2 cup almond milk

2 very ripe bananas

1/2 cup chopped walnuts (optional)

Baking sheet lined with parchment paper.

Directions:

1. In large mixing bowl combine all dry ingredients and whisk out lumps.

2. In separate bowl mash bananas with fork then add oil and milk, combine until creamy.

3. Add wet ingredients to dry and mix until combined, then fold in nuts.

4. Scoop out mixture with spoon and place on parchment paper and bake for 13-16 minutes depending on how soft you like your cookies. Enjoy!!!

Ever Onward,

Jennifer Esposito

Vegan, Gluten Soy & Dairy Free Sweet Potato Scone For Your Heart Health and Smile :)

As most of you know having celiac disease is an ever and on going journey. Every meal needs to be looked at, even vitamins and minerals need to be monitored from time to time to make sure your getting all your nutrients. This lifestyle can definitely be a struggle at times. And for me the last couple weeks have been a struggle to say the least. In efforts to find relief I started doing more research to find ways I can get even more vitamins and minerals in to my system to supplement what I have been low in which is vitamin B and my vitamin D is always in constant conflict. One thing I kept coming to in my search to feel better was the sweet potato. A beautiful orange sweet potato. I used to love these as a kid! I would load them with butter and eat hot or for Thanksgiving I’d make them as candied yams and bake them with marshmallows on top… ohh so good!! But these days I eat my sweet potato brushed with olive oil, sprinkled with a little bit of cinnamon, turmeric, and salt and it makes me just as happy! Or I make sweet potato fries which always makes a great snack or side. Not only are there many ways to prepare sweet potatoes, they are inexpensive AND are so good for you!

As I was feeling down and not so great I thought let me go back to the friendly sweet potato that keeps coming up in this search for answers. And before I get to the new recipe I created let me tell you some of the MANY health benefits besides being absolutely delicious! The sweet potato is very high in vitamin B6 which is so necessary for the bodies immune and nervous system, decreases inflammation and is great in preventing degenerative diseases including heart disease. It is a great source of vitamin B which wards off cold and flu and plays an important role in digestion and blood cell formation. It also accelerates wound healing and protein production. And if you don’t know – collagen is one of the most abundant proteins in body, which helps maintain the skins youthful appearance which we all love! The sweet potato is a great food to fight against cancer and contains high levels of vitamin D which is so important for us Celiacs and anyone! Actually, there are studies stating most people are suffering from vitamin D deficiency, and low vitamin D can then lead to depression. Sweet potato is wonderful for proper immune function which Celiacs definitely need, a great source of magnesium which aids in relaxation and an anti stress mineral – a reason I should be eating a sweet potato everyday of my life! And finally a great source of potassium, that maintains healthy levels of blood sugars in the body unlike sugars consumed from a sugary cereal or treat because white or refined sugars are released in to the blood stream quickly. The sugar from a sweet potato (that is loaded with fiber as well!) is a different kind of sugar and helps stabilize the blood sugar in body instead of making it spike which causes fatigue and weight gain.

The rich orange colors in a sweet potato means that it is high in beta carotene which is a great boost for immunity to disease and has powerful anti-oxidants! And like I said before, there are a variety of ways you can prepare them – you can roast them, bake them, steam them, grill, and/ or puree them. In this recipe, however, I decided to use pureed sweet potatoes to make a SCONE! And they turned out so good!! My Troop Franky Beans was circling me like a shark because of the warm sweet smell in the house! I paired the sweet potato with some wonderful cinnamon, cloves, and maple syrup which makes it all the better. I also decided to use quinoa flour which is a wonderful fiber and wonderful grain. If you have not experimented with any quinoa yet I highly recommend you do (also numerous way to cook/bake and eat)! And almond flour because it is full of protein and fiber. Those two flours are the majority flour in this recipe followed by brown rice flour. These scones are vegan, dairy free, gluten free, and soy free. But NOT taste free as always with my stuff!! This recipe is super easy to make, so eat up and know when you are eating these scones you are doing something beneficial for your body and mind.

Sweet Potato Scones

preheat oven to 400*, bake 15-17 minutes

Ingredients:
1 1/2 cup almond flour
1/2 cup quinoa flour
1/2 cup arrowroot starch
1/2 cup brown rice flour
1/3 cup grape seed oil
1/3 cup maple sugar (or can use coconut sugar, date sugar, or lastly brown sugar just has less nutritional value)
3/4 cup rice milk (or milk of choice)
1 tbls fresh lemon juice
3/4 tsp xanthan gum
2 tbls baking powder
1/4 tsp salt
1/4 tsp ground cloves
1 tsp cinnamon
1/2 tsp fresh dried vanilla, or 1 tsp liquid vanilla
1/2 of 15 oz can of sweet potato puree
1/2 cup chopped pecans (optional)
1/3 cup maple syrup (for brushing on top of scones)
One baking sheet lined with parchment paper

Directions:
1. Whisk together sweet potato, rice milk and lemon juice (if using liquid vanilla add here).
2. In a separate bowl combine all flours, xanthan gum, maple sugar, baking powder, salt, cinnamon, vanilla and cloves (and pecans if choose), whisk out lumps.
3. Add the wet ingredients to the dry and combine with a wooden spoon.
4. Take a tablespoon of batter and drop on cookie sheet covered in parchment paper.
5. Place in oven for about 15 to 17 minutes (want firm texture and/or slightly browned bottoms).
6. After about 11 minutes or when tops of scones get a bit firm brush maple syrup over top and then continue to bake. ENJOY!!


Ever Onward,

Jennifer Esposito

A Quick Go To Gluten Free Meal

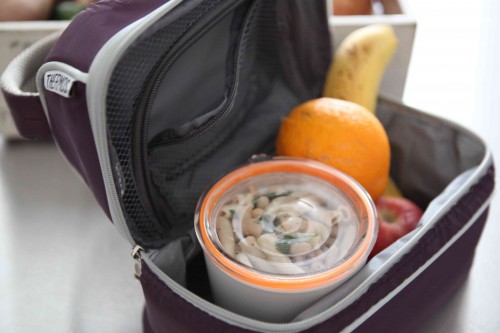
When I’m working on the set of Blue Bloods, rarely can I eat what Kraft services or catering has to offer because of all my extreme allergies. And while the show is only an hour on TV the amount of hours and days and nights that go in to creating the show is a whole other beast… The days are long and nights can be longer. Although Krafty always tries to have something for me, I’d rather be safe by preparing my own food. So I really have to prep for these work days and bring plenty of food to set to keep me going and my energy high. We all probably find ourselves in situations where we need something quick and easy but still want it to taste good while filling us with nutrients to get us through!

So! Whether it be for a quick dinner or a light snack I love making this pasta dish!! It’s low in fat and cholesterol, loaded with fiber and iron from the cannelloni beans, and rich in antioxidants and calcium (along with tons of vitamins such as C, E, folate, omega-3 fatty acids…!) from the spinach. This dish is so low maintenance – it literally takes one pot to prepare, has very few ingredients, and is simple to make! It’s so good and easy that I always keep the ingredients stocked in my pantry. I will make it for dinner one night and keep the left overs for work the next day or two. And while it tastes just as good at room temperature, it reheats very nicely. I personally like to add a bit of water when reheating to reignite the starches and then becomes really thick, almost like there is cream in it! Add a bit more olive oil, salt and pepper to taste and there you go!

A great quick healthy 4 ingredient snack or meal!


Pasta with Beans and Spinach

Ingredients:

1 bag of gluten free pasta (my favorite is Tinkyada!)
2 handfuls of fresh baby spinach
Small handful of fresh parsley chopped
1 can cannelloni beans
Olive oil
Salt and pepper to taste

Directions:

1. Bring a large pot of salted water to a boil.
2. When water is bubbling pour in one bag of pasta and turn down heat to medium for slow boil.
3. In the meantime drain beans and rinse.
4. Rinse spinach, pat dry with paper towel and set aside.
5. Check pasta often. Should be firm yet easy to chew (check package for directions).
6. When done drain pasta and rinse lightly with lukewarm water. Leave pasta in strainer.
7. Using the same pot the pasta was cooked in add about a half cup of olive oil and the beans and cook on high heat.
8. Add salt and pepper to taste and continue stirring.
9. Throw in parsley and stir together. Do this for about 3 minutes on high heat.
10. Turn down heat to medium and add pasta. Stir to combine.
11. Finally add spinach, stir again to incorporate all the flavors!! Cook another 2 minutes. Remove from stove, add more salt and pepper if like, or even some red pepper flakes for some heat!!! And ENJOY!!!


Ever Onward,

Jennifer Esposito
A Steak Fit for a Queen, Betty Boop.

Betty Boop in her favorite spot on the couch

As some of you have probably noticed I have not posted in a few weeks. Some of you may have come to the sad conclusion that something was wrong. Yes it is so, my beloved Troop, Betty Boop has passed away. It happened a few weeks ago and I just needed some time to breathe. She went quickly and in my arms as I said goodbye to my sweet wonderful friend. I thank you all for your kind words and prayers. She was an awesome dog and a better friend.

I have written previously that in her last months she ate like a Queen. Her favorite meal being a juicy well seasoned Filet Mignon. Her eyes would light up as the smell would take over the apartment. Towards the end though she really wasn’t very interested in food. Except when would I sit next to her on the floor to share her steak she’d have a few bites as if to say “thank you”. Then I thought what better recipe could I share! It’s simple, savory, and should absolutely be shared with someone YOU love.

My other Troop, Mr Beans is finally getting over the loss as well. He is ready to get back to our mission of bringing you delicious nutritious recipes and all the best information for your health.

We thank you, send you love and of course MUCH MUCH HEALTH.

Ever Onward,

Jennifer Esposito


My cooking assistant Betty Boop front and center!

Betty Boop Steak

preheat oven to 350*


Ingredients:

Filet Mignon

Olive oil

Salt and pepper


Directions:

1. You want the piece(s) of meat at room temperature.

2. Season with salt and pepper on both sides, take olive oil and brush over steak.

3. Make frying pan nice and hot with olive oil and even a dab of butter or Earth Balance. The heat of pan should be high enough so that if you splash some water on pan it sizzles. You can use a grill pan or a fry pan and put the steak down when hot enough.

4. The thickness of each steak will determine when and how often you turn it – you don’t want to turn it too much. You want to let it get a nice crispy outside, sear it. 2-3 minutes on each side (depending on thickness).

5. Then pop steak in oven for about 5 minutes and after you take it out let it sit for few minutes to let juices marinade. You can cut up some ripe plum tomatoes to put on top of the steak with some added olive oil and salt and pepper. Another great option is to slice the steak (on chopping block) against the grain of meat and put over some fresh spinach, drizzle with olive oil and salt and pepper. YUM!!!!


Betty Boop in her Glory Days


One of her many Halloween costumes!

Boop taking advantage of one of the many beautiful New York summer days!

My Lady Betty Boop

City Boop meets meets the country!

My Troops on summer vacation in Hamptons.

Betty Boop trying to be serious!

Betty pushing through the Holidays!

Betty Boop loving the beach life.

Quality time with my beloved Betty Boop.

What Do You Miss? Snicker Doodles!!

When I was a kid I loved baking chocolate chip cookies with my sister. Whether it be during Christmas or just one lucky Sunday afternoon, I was thrilled! Thrilled because I got to eat these hot chocolate chip cookies as they came out of the oven but thrilled also because I got to spend this time with my older sister who was… my GOD. We had such a blast and the smells that would come out of our kitchen! The butter the vanilla the chocolate ALL baking together, would create an aroma throughout the house that would linger for days. As we got older we continued this tradition. I could be anywhere and anyone baking a chocolate chip cookie would bring a smile to my face.

When I was diagnosed with celiac disease and my sister was diagnosed as well, we didn’t know what to do. We knew that the tradition that we had for so long and that was so loved was going to be gone. So when I started my mission to create nutritious gluten free foods one of the first cookies was chocolate chip. My sister and I danced with glee when I first offered her one of these cookies. And it got the taste test of approval from her 10 year old son who couldn’t tell the difference between my cookie and the original Toll House we use to bake.

Upon reading all of your What Do You Miss emails I realized that so much of what we miss is not only the taste and the experience but it’s also the memories that come with it. Having celiac disease we have to take away so much – gluten, dairy, and whatever else we need to feel healthy. We should not have to give up our memories as well! I wasn’t having any of it. It is my mission to create as many of these What Do You Miss recipes for you as I can because I realize that food is not only about something good to eat but it’s about our memories.

The first What Do You Miss, entry that I chose, Bette Dixon, requested the snicker doodle cookie. What got me about her story was the similarity between two sisters and how important it is to have these bonds of yesterday. So! I got in that kitchen with My Troops and we went on a voyage to figure out how to make a snicker doodle cookie. And after a few attempts and a lot of taste testing I finalized the perfect combination of goodness! Now, I do have to say I’ve never had the good opportunity of having a snicker doodle before celiac disease so I didn’t have much to go on but I did enlist my friends as taste testers who reported mine have a bit of a maple taste. Which is because as you may know I don’t use real sugar. If you want to use real sugar then I’m sure these would probably taste more like a “regular” snicker doodle. But from a non snicker doodle eater before, I tell you I am a new snicker doodle cookie eater! These cookies came out fantastic and I really hope you enjoy them! So Bette, I hope this recipe is as delicious as your Granny’s! I would love if you would take pictures of you and your sister and whoever else you enjoy baking these treats with. Lets start creating new memories while we are able to save the old ones.

Ever Onward,

Jennifer Esposito

“…like you and your sister, Sherrie and I used to bake a lot when we were kids. We lived out in the country without a lot to do, so baking together was one of few things we could do together with our age differences. Our grandmother, “Granny” always had to have a dessert after dinner and with her cup of green tea, so snicker doodles was one of our favorite of hers.”

Snicker Doodles

preheat oven to 375*, refrigerate mixed dough for 1 hour, cook 10-12 minutes

Cookie:
1 cup Jennifer’s Way All Purpose flour or gluten free flour (confirm flour does not have xanthum gum already in it and if it does do not add additional)
1/3 cup maple sugar
1 tbls maple syrup
1/2 tbls lemon juice
1/2 tsp baking powder
1/4 tsp cinnamon
1/2 tsp vanilla fresh bean
1/4 cup Earth Balance, or butter
1 egg
1/4 tsp xanthum gum
pinch of salt

Cookie Topping:
2 tbls maple sugar
2 tbls cinnamon
Combine and set aside for step 7

Cookie Directions:
1. Combine all dry ingredients and set aside.
2. Beat room temperature egg for 1 minute on high.
3. Add butter to egg and whip on high for another minute and half.
4. Add lemon juice followed by maple syrup.
5. Slowly pour in the dry ingredients in to wet until combined.
6. Cover bowl of dough with plastic wrap and place in refrigerator for 1 hour.
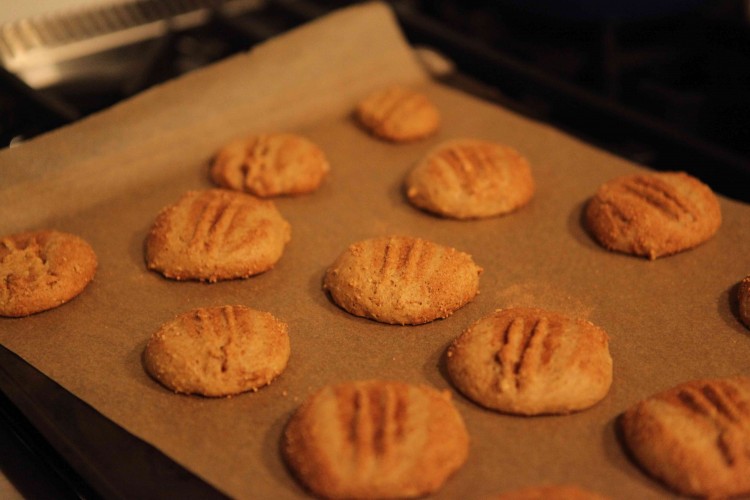
7. Finally scoop out spoon full of dough, roll into a ball, flatten with a fork, sprinkle the maple sugar and cinnamon mixture on top of cookie, place onto baking sheet and cook for 10-12 minutes (or longer if prefer a crispier cookie). Enjoy!!!!

Have You Ever Had Sesame Parsnip Fries!?

I was home last Saturday night with My Troops, my favorite place to be, when I had an urge for some fries! Yes I know we gluten free challenged can have fries as long as they are cooked in a gluten free cooker but I wanted something more! I also wanted something sweet. Love that salt and sweet mixture. Every week I like to go to the farmers markets and fill up a basket full of whatever fresh veggies the farmers have that day and then unpack it all on to my counter in the kitchen. Since I hate seeing food go to waste it forces me to bake or concoct something with those veggies and chow down.

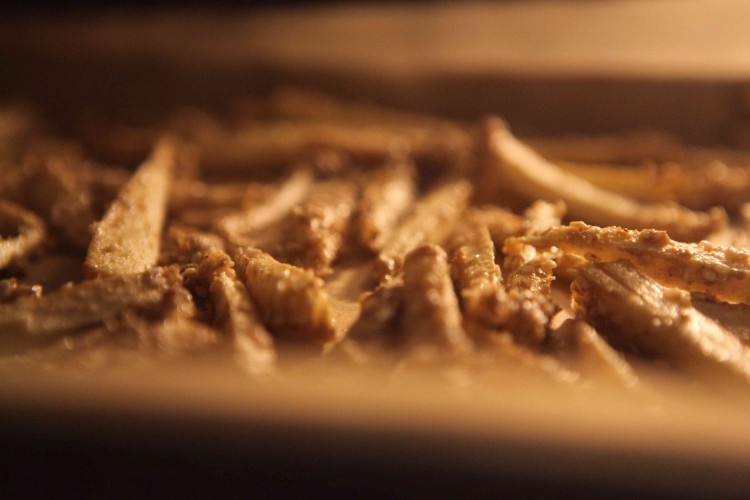
So My Troops and I wondered into the kitchen and there they were – these long thick fresh parsnips. Sitting next to two huge sweet potatoes. At first I thought of an obvious choice for fries – some sweet sweet potato fries. But instead, I picked up the parsnip and remembered I read about parsnip fries in one of my hundreds of cookbooks. I cleaned, peeled and cut up the parsnips into exact replicas of the glorious fry. As I went for the olive oil I saw sesame seeds and had an idea… what about a peanut butter topping????? Looked in the fridge and instead of peanut butter I grabbed the sunflower butter, which is ground sunflower seeds (much better for you than peanut butter) So I went for it! Forty five minutes later My Troops and I sat on the couch, the warm house smelling like love and we ate the best crunchy, savory, yummy fries I’ve had in a long time! Did I mention they looked like McDonald’s fries? :) YUM!!

Some tips if you are unfamiliar with parsnips know they are rich in potassium and a good source of daily fiber. They store very well, up to 2-3 weeks unwashed in the refrigerator (in plastic bag). Although this is their peak season they are available year round, and it is best to choose ones that are moderate in size and well shaped – not pitted or shriveled.

Sesame Parsnip Fries

preheat oven at 400, cook for 35-50 minutes or until browned and crispy

Ingredients:

2-3 medium size parsnips

3 tbls sunflower butter

1/2 tsp salt

2 tsp organic olive oil

2 1/2 tbls sesame seeds

Directions:

1. Cover baking sheet with parchment paper.

2. Clean parsnips, peel outer layer like a carrot, cut into thin strips like fries.

3. In a large bowl combine sunflower butter, oil, salt, sesame seeds.

4. Add parsnips and mix with spoon or hands to coat strips.

5. Place on baking sheet and bake until crispy and brown – ENJOY!!!!!


Ever Onward,

Jennifer Esposito
What Do You Miss Coming Attraction! Wet your palate with Yum Balls

First a BIG THANKS to everyone who shared your stories for What Do You Miss, not only telling me what foods you miss the most but WHY. It’s amazing how the simplest things can bring back the happiest and vivid memories.

While going through all the entries and reading all the food stories I got so hungry I had to get in the kitchen and make something!! I ended up creating this cookie that has something for everyone. And while it tastes AMAZING it is also packed with all sorts of good for you ingredients – it’s healthy and called a Yum Ball!!


Yum Balls

preheat oven to 350, bake for 18-22 minutes (depending on oven)

Ingredients:

1 1/2 cup almond flour

1/2 cup arrowroot flour

1/2 cup quinoa flour

1/2 tsp salt

1 tbls vanilla

1 cup oats (certified gluten free)

1/2 cup shredded coconut

1/2 cup chopped pecans

1/2 cup chocolate chips (gluten, dairy, soy free)

1/4 cup grape seed oil

1/3 cup coconut sugar or date sugar, or maple syrup sugar

3 tbls almond milk

2 eggs

Directions:

1. Mix almond, arrowroot, and quinoa flours, oats, shredded coconut, coconut sugar, and salt together and whisk out lumps.
2. Beat 2 eggs until frothing, then add oil and beat another minute.
3. Add dry ingredients to wet, adding the almond milk right before all the dry mixture is gone.
4. Fold in the nuts and chocolate chips.
5. Scoop out small balls of mixture and place on parchment paper lined cookie sheets (2) and place in oven.

Ever Onward,

Jennifer Esposito

Chicken Salad on a Pure Wrap

My new love! Chicken salad on The PURE wrap!!!!

A long time ago I did a movie involving vampires and although it was not one of my finest moments I did discover something on that set that I thought was fantastic! A kraft service lady would take a banana, peanut butter, rice crispy’s, a little bit of honey and some chocolate syrup and roll it all up in a tortilla. She would cut it up and bring it to set when we were working nights. And every little pop of these things in your mouth was crunchy and gooey and oh so amazing! I loved them! Then in the morning she would bring breakfast wraps. Everything in this little simple wrap. I was hooked and was on a wrap kick- you could throw anything in these wraps and it was delicious and easy! 

Well… unfortunately, as most of you know, wraps are a thing of the past. Yes, I know there are some gluten free wraps but none that I can recommend, especially the ones that are made out of corn… since corn just turns into sugar I choose not to eat it. 

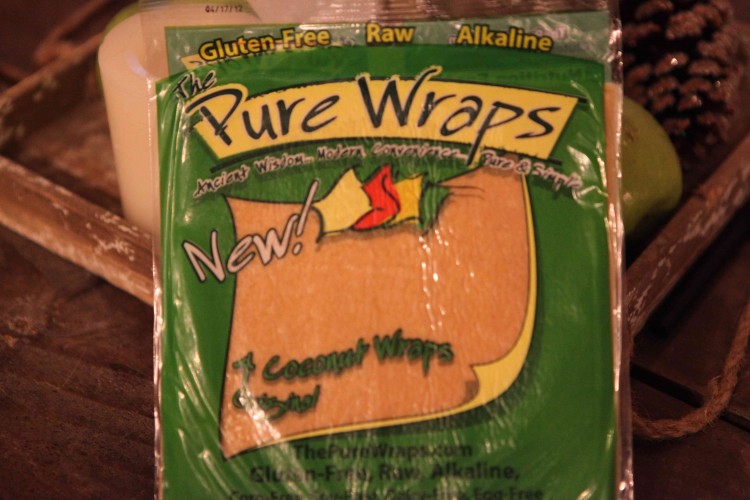
HOWEVER!! The reason for this new blog post is because I just discovered my new favorite thing! It’s called the Pure Wrap and made from nothing but coconut. I know I have talked about coconut before on the blog but if you missed it coconut is packed with nutrients and is good for you in so many ways! Good for your bones and immune system, reduces inflammation… I could go on!

I found these wraps and what they are made of is rolled out coconut meat and water, making the most amazing wraps!! So in the kitchen, with both Troops in hand, I made a sun-butter, honey and banana wrap and it was like the old days on set when I ate without much caution. Which is precisely what I’m about these days – bringing back the tastes of yesterday and making them so I can eat them today! I always feel a little bit of a victory when I am able to do that. I wont allow this disease to stop me from enjoying my life and reminiscing in my memories of yesterday.

I highly recommend these wraps!

So, on a wrap kick again – I created this delicious chicken salad I would like to share and hope you will try, whether you put it on the Pure Wrap, an english muffin or something else. But these Pure Wraps work great and are perfect for kids because there is so much you can do with them. They will remind you of yesterday which makes me so HAPPY!!

Chicken Salad Wraps

Ingredients:
2 cups shredded organic chicken
1 celery stalk chopped
1 carrot shredded or thinly sliced
1 1/2 very ripe avocado
1 tbls fresh squeezed lemon juice
1/3 cup olive oil
salt and pepper
2 Pure wraps 

Directions:
1. Take shredded chicken and combine with very ripe and smashed avocado mixing with fork.
2. Add in celery and carrots.
3. In a separate bowl add lemon juice and olive oil and whisk until thick.
4. Pour over chicken avocado mixture and mix up, add a splash more olive oil, salt and pepper to taste.
5. Scoop the chicken salad into the wrap, roll it up and ENJOY!!!!! 


Ever Onward,

Jennifer Esposito
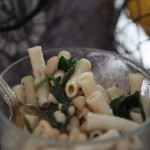
Coconut Chia Seed Pudding… Gluten, Dairy & Soy Free, Vegan and Raw Goodness!!!

Chia Seed Coconut Pudding! A Powerhouse of Nutrition!

Chia Seeds, yes those tiny seeds that you add water to and suddenly you have a small cat, dog or head of sprouts called your Chia Pet. Believe it or not, those same silly seeds are a powerhouse of nutrition. Chia seeds are loaded with omega 3s which is used as the primary building block of every cell in your body. They have very high content of omega 3s, more than flax seeds and a great alternative to eating fish. And as many if not more anti-oxidants than blueberries! Other benefits include fiber, calcium, phosphorus, magnesium, copper, iron and zinc to name a few. Chia seeds help slow down the process of converting carbohydrates into sugar in your body, meaning it stabilizes your blood sugar levels. You will feel full longer due to the fact that they absorb so much water and have such a high fiber content.

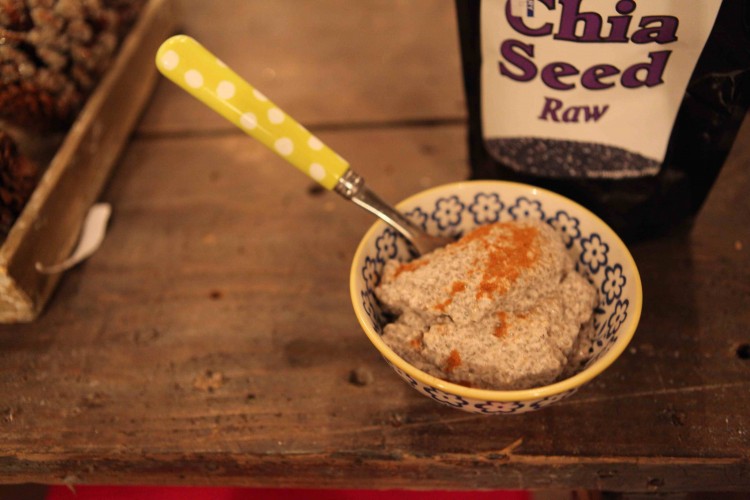
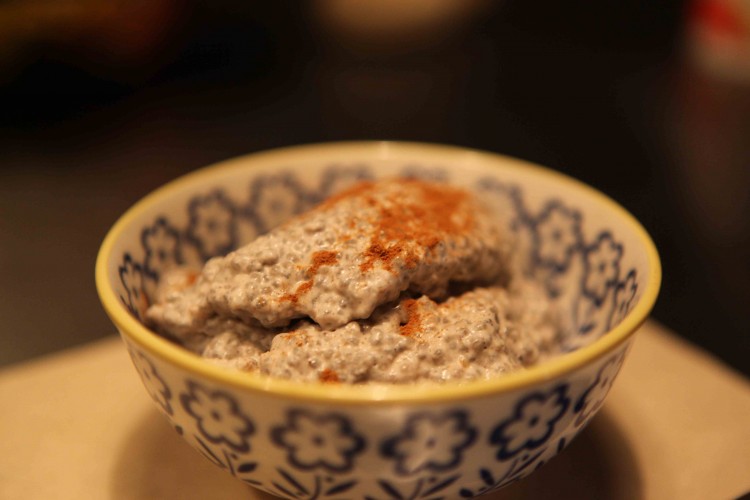
You can add the seeds to salads, yogurts or make them into an insanely delicious pudding as I have (below). This is not just another low carb, low sugar, gluten free, vegan recipe I’ve created for you, this is seriously a pudding you should incorporate in to your diet for optimum health! This recipe makes a large bowl of pudding. I like to eat some in the morning, as a snack, add it to smoothies and even add it to other recipes. Chia seeds have no flavor on their own so will absorb the flavors of whatever you combine it with.

Now onto coconut and why I used it with this already amazing seed!? Coconut is wonderful for the immune system! Which we all need to keep strong. Especially this time of year when everyone is sneezing around you. Coconut milk is known to have antibacterial and antifungal properties which help aid in fighting off disease. Also wonderful because it’s a healthy fat that we ALL need.

Make this pudding today and start reaping the rewards of that little seed that once was just a weird sprouted head on a late night tv commercial. Who would have thought :)

Coconut Chia Seed Pudding

Raw, vegan, and gluten, soy, and dairy free

Ingredients:
2 cups coconut milk (light or full fat)
1 cup almond or hemp milk (at room temperature)
2 1/2 tbls maple syrup (add more if prefer a sweeter taste)
1/2 cup chia seeds
3/4 shredded coconut unsweetened
1 cup water
1 1/2 tsp cinnamon
1/2 tsp vanilla bean
1 tsp fresh nutmeg
pinch of salt

Directions:
1. Combine coconut milk, water and shredded coconut in blender. Mix on high speed until creamy. Empty in bowl and set aside.

2. In same blender add almond milk (at room temperature), cinnamon, vanilla, maple syrup, and pinch of salt and mix together on high until creamy. Pour into large mixing bowl

3. Add chia seeds to the almond milk mixture and whisk briskly until combination thickens.

4. When mixture resembles a pudding texture add the coconut milk and flake mixture and whisk a bit more.

5. Cover the mixing bowl with plastic wrap and refrigerate  30 -40 minutes before serving. YUM!!!


Ever Onward,

Jennifer Esposito
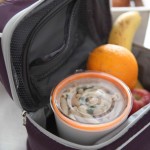
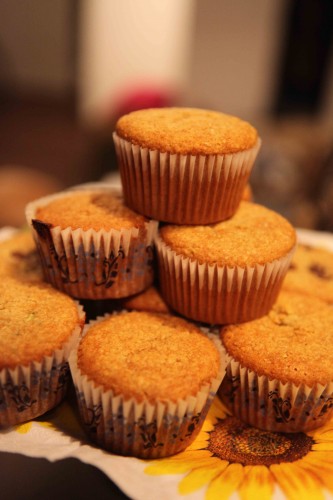
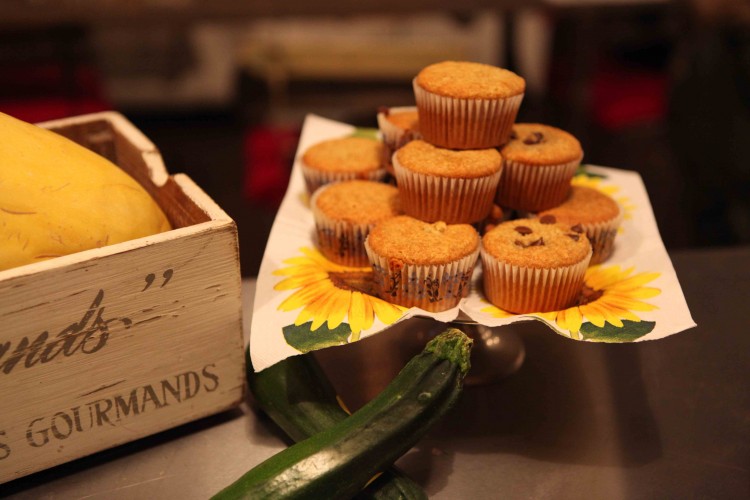
Did you know… link between celiac disease and diabetes!? A Honey Zucchini Muffin to the rescue!

Did you know that there is a genetic link between Type 1 diabetes and celiac disease?! Did you also know that celiac disease and diabetes are inflammatory disorders and share common genes??

The two disorders are more closely linked than previously understood. Since celiac disease is also an autoimmune disease it puts us at a higher risk for all other autoimmune diseases including diabetes. Having celiac disease is hard enough without adding another health issue on top of that, especially diabetes.

What can we do? Start to really read the labels of most of the gluten free products out there on the shelves right now. They are loaded with sugar and carbohydrates which turn into sugar. This means we really MUST make better choices when eating gluten free! We must be aware of our sugar and carbohydrate intake in each product. Unfortunately we can not rely on the words “Gluten Free” stamped on a box to mean that it is healthy. With the increasing demand for gluten free foods the big food companies are seizing this money making opportunity and starting to put gluten free labels on their products while having no regard for the insane sugar content, preservatives and absolutely no nutritional value in them. Remember that all gluten free foods are not created equal! Start choosing foods that are made from a protein base like almond flour or bean flour. Or a high fiber base such as brown rice flour and quinoa flour. Stay away from white rice flours, tapioca starches and potato as MAIN ingredients.

Even with the endless amount of research I have done on this subject I did not know about this close link between diabetes and celiac disease. So what did I do? Got right in the kitchen and started to create some super high protein, low carb, low sugar and high in fiber treats. None of my recipes ever have a high sugar content but I figured out how to lower them still. I don’t ever eat or use white or brown sugars. Also not a fan of the highly controversial agave or fake sweeteners either. The one sweetener I do use is maple syrup which is loaded with anti-oxidents but even that is a form of sugar. Some other options to play with is coconut sugar, which goes into the bloodstream slower, or honey when baking. Also Stevia, which is a natural sweetener made from a leaf, is the only sweetener I’ve found that does not spike blood sugar or support yeast growth. While I have experimented with it only once or twice, I can not say I love it.

I created a scrumptious Zucchini Honey muffin recipe with all this in mind and not only is it delicious but ideal for people with celiac disease or diabetes, and perfect for people on a Candida diet or the Paleo diet. Remember you must take your health into your own hands. Read those labels, make better health conscious decisions and start to feel better!


Zucchini Honey Muffins

Preheat oven to 350, makes 12 low sugar and high protein muffins that are YUMMY

Ingredients:
1 1/2 cup almond flour
1/2 cup quinoa flour
1/2 tsp baking soda
1 tsp baking powder
1/2 tsp salt
2 eggs
1 cup grated zucchini
1/4 cup grape seed oil (canola or olive oil are also options)
1/3 cup honey (wild pure honey best option)
1/2 tsp lemon zest
1 tbls almond milk

Directions:
1. Grate zucchini and place between a few paper towels to get out excess water and set aside.
2. Combine all dry ingredients and whisk together.
3. In a separate bowl beat eggs for a minute or two until fluffy.
4. Slowly add the oil to eggs and combine.
5. Add honey and lemon zest to egg mixture.
6. Start adding dry ingredients slowly adding the almond milk intermittently until combined.
7. Lastly mix in the zucchini and then fill muffin tins lined with muffin holders and bake for 20 to 25 minutes depending on your oven. Toothpick should come out clean from center of muffin. Enjoy!!


**Here are some websites that you may find informative to further breakdown the connections between celiac disease and diabetes:

Ever Onward,

Jennifer Esposito